Instructions:
1. Prepare the Crust:
- In a large mixing bowl, combine flour, salt, and sugar. Add cold cubed butter and use a pastry cutter or your fingers to work the butter into the flour mixture until it resembles coarse crumbs.
- Gradually add ice water, 1 tablespoon at a time, mixing with a fork until the dough comes together. Be careful not to overwork the dough.
- Divide the dough in half, shape each half into a disc, wrap in plastic wrap, and refrigerate for at least 1 hour.
2. Preheat Oven:
- Preheat your oven to 375°F (190°C).
3. Prepare the Filling:
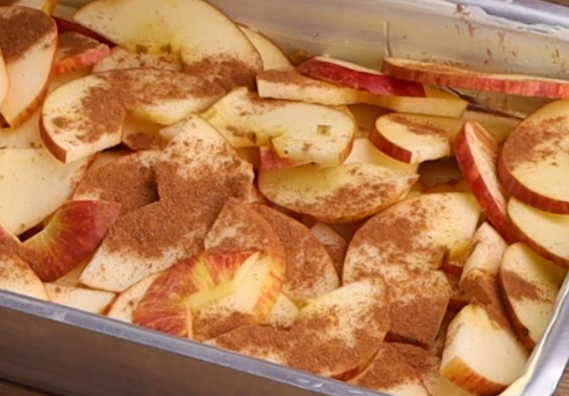
- In a large mixing bowl, combine sliced apples, granulated sugar, brown sugar, flour, cinnamon, nutmeg, lemon juice, and vanilla extract. Toss until the apples are evenly coated with the mixture.
4. Roll Out the Dough:
- On a lightly floured surface, roll out one disc of dough into a circle large enough to fit your pie dish. Transfer the rolled-out dough to the pie dish and gently press it into the bottom and sides.
5. Fill the Pie:
- Pour the apple filling into the prepared pie crust, spreading it out evenly.
6. Top the Pie:
- Roll out the second disc of dough and place it over the apple filling. Trim any excess dough, leaving a ½-inch overhang. Fold the edges of the top crust under the bottom crust and crimp the edges to seal. Cut a few slits in the top crust to allow steam to escape.
7. Bake:
- Brush the top crust with beaten egg and sprinkle with cinnamon-sugar mixture.
- Place the pie on a baking sheet to catch any drips and bake in the preheated oven for 45-50 minutes, or until the crust is golden brown and the filling is bubbling.
8. Cool and Serve:
- Allow the pie to cool for at least 2 hours before serving to allow the filling to set. Serve warm with a scoop of vanilla ice cream for the ultimate indulgence!
Cook Notes and Variations:
- Additions: Enhance the flavor of your apple pie by adding a handful of raisins, chopped nuts, or a splash of bourbon to the filling.
- Crust Designs: Get creative with your pie crust by using cookie cutters to make decorative shapes or weaving strips of dough for a lattice top.
- Glaze: For a glossy finish, brush the baked pie with a mixture of warmed apricot preserves and water.
FAQs (Frequently Asked Questions):
- Q: Can I make the pie crust ahead of time?
- A: Yes, you can prepare the pie crust dough up to 2 days in advance. Simply wrap it tightly in plastic wrap and refrigerate until ready to use.
- Q: How do I prevent the crust from becoming soggy?
- A: To prevent a soggy bottom crust, you can blind bake the bottom crust before adding the filling. Simply line the crust with parchment paper, fill with pie weights or dried beans, and bake at 375°F (190°C) for 15-20 minutes until lightly golden brown.
- Q: Can I freeze apple pie?
- A: Yes, you can freeze unbaked apple pie for up to 3 months. Wrap the assembled pie tightly in plastic wrap and aluminum foil before freezing. When ready to bake, allow the pie to thaw in the refrigerator overnight before baking according to the recipe instructions.
Keto and Low-Carb Versions:
For a keto-friendly or low-carb version of apple pie, you can make a crust using almond flour, coconut flour, and melted butter. For the filling, use a sugar substitute like erythritol or monk fruit sweetener instead of granulated sugar. Adjust the measurements accordingly and enjoy a guilt-free slice of pie!
Homemade apple pie is more than just a dessert—it’s a labor of love that brings people together and creates cherished memories. With its buttery crust, tender apples, and aromatic spices, this classic treat is a testament to the simple joys of baking. Whether you’re baking for a special occasion or simply craving a taste of nostalgia, this recipe is sure to delight your taste buds and warm your heart. So roll up your sleeves, preheat your oven, and get ready to savor the irresistible goodness of homemade apple pie!
Source: plusdeclics.com


